

How to Make Shrink-Plastic Keychains Step by Step
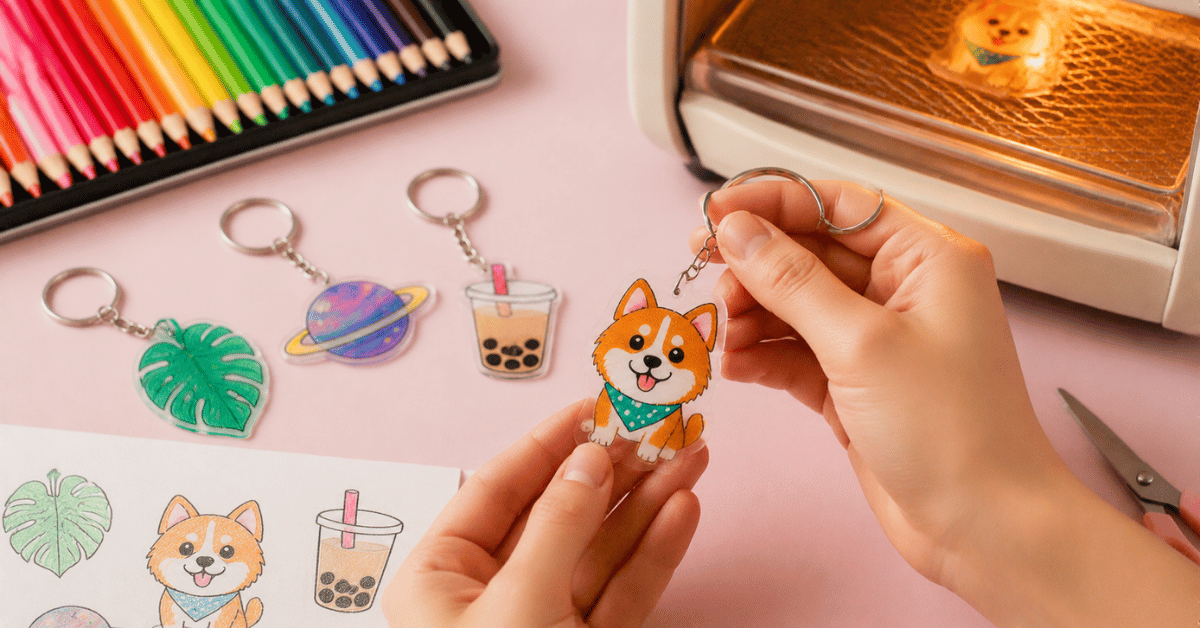
Shrink-plastic keychains look deceptively simple: draw a design, cut it out, heat it, and attach a key ring. In practice, the difference between a neat, durable charm and a warped piece of plastic comes down to a few details that beginners often miss. The design becomes much smaller during heating, colors intensify, punched holes shrink too, and the plastic temporarily curls before flattening.
That transformation is exactly what makes shrink art so satisfying. A thin, flexible drawing turns into a small, rigid charm that can be used on keys, bags, pouches, zipper pulls, or handmade gifts. Purpose-made shrink film is designed to become thicker and harder as it contracts, although the exact amount of shrinkage varies by product and heating conditions.
For people in Singapore who would rather learn the process with guidance, Craft Labs offers a hands-on shrink-art workshop where participants draw, color, heat, and turn their designs into accessories or decorative pieces. Its listed workshop duration is about 1 to 1.5 hours, and materials and equipment are provided.
Making shrink-plastic keychains at home is also very achievable. The key is to plan for the transformation before the plastic ever enters the oven.
Materials and Setup Before You Start
Start with purpose-made shrink plastic or shrink film that includes heating instructions. Different brands can behave differently: Grafix, for example, says its film generally shrinks to around half its original dimensions, while Carnegie Mellon University’s instructions for Shrinky Dinks describe that product shrinking to roughly one-third of its original dimensions. Because shrink ratios, oven temperatures, and heating times vary, testing a small scrap first is more reliable than assuming every sheet behaves the same way.
For a basic keychain project, prepare:
- Shrink-plastic sheets appropriate for your chosen coloring medium
- Permanent markers or colored pencils
- Pencil and paper for sketching or tracing
- Craft scissors
- Standard paper hole punch
- Parchment paper or another liner recommended by the film manufacturer
- Baking tray and conventional or toaster oven
- Key ring, jump ring, or short keychain chain
- Small jewelry pliers for opening and closing jump rings
How to Make Shrink-Plastic Keychains Step by Step
A good keychain is designed backward from the finished result. Think about the size, attachment point, and color intensity first; then create the larger pre-shrunk version.
Draw and Color With the Finished Size in Mind
Step one: Plan your final keychain size. Because shrink film contracts substantially, your original artwork must be larger than the charm you eventually want. Since manufacturers report different shrink rates, make a small test square if precise dimensions matter. Measure it before and after heating; that gives you a practical shrink ratio for the exact film and oven you are using. Manufacturer guidance likewise recommends testing scrap material to establish the most suitable heating conditions.
For example, a name tag, pet illustration, company icon, favorite food, flower, or Singapore-inspired design such as a Merlion-themed charm can be drawn several centimeters larger than the intended keychain. Avoid extremely fine lines near the edge, because the entire design becomes more compact during shrinking.
Step two: Draw or trace your artwork. Transparent shrink plastic is particularly useful for tracing: place it over a printed or hand-drawn reference and copy the outline. Freehand drawing works equally well when you want each keychain to look different. Both Grafix and Carnegie Mellon list drawing or tracing as standard ways to prepare shrink-film designs.
Step three: Add color without making it unnecessarily dark. As the surface area decreases, the artwork becomes visually more concentrated. Carnegie Mellon’s explanation notes that the design remains while the plastic contracts and thickens, and Grafix’s instructions similarly caution that colors intensify during shrinking. Slightly lighter coloring before heating can therefore produce a better-balanced finished charm.
Let marker ink dry before handling the sheet so your fingers do not smear the artwork.
Cut and Punch the Charm Before Applying Heat
Step four: Cut around the design smoothly. Use craft scissors to follow the outline, leaving enough material around delicate areas so they do not become weak attachment points. Carnegie Mellon specifically recommends smooth cuts and slightly rounded corners because edges become harder and can feel sharper after shrinking.
This is an important difference between keychains and ordinary shrink-art decorations. A decorative charm only needs to look good; a keychain must also withstand repeated movement against keys, bags, and other objects. Avoid extremely narrow necks between the main artwork and the area containing the hanging hole.
Step five: Punch the attachment hole now—not after shrinking. A standard paper hole punch is suitable for many shrink-plastic projects, and both Carnegie Mellon and Grafix recommend punching attachment holes before heating. The hole contracts along with the rest of the film, producing a smaller opening in the finished charm.
Leave a reasonable border between the hole and the outside edge. A hole placed too close to the edge creates a thin plastic bridge that may be more vulnerable when the keychain is pulled or twisted.

Shrink, Flatten, Cool, and Attach the Hardware

Step six: Heat the design according to your film’s instructions. Preheat the oven, line the tray with the surface recommended by your manufacturer, and place the pieces so they have room to move. Grafix recommends parchment, vellum, suitable cardboard, or a compatible liner rather than placing its product directly on bare metal.
Do not panic when the plastic curls. Curling is a normal stage of the shrink process. The piece typically bends and moves dramatically before settling flatter as shrinking finishes. Removing it the moment it starts curling is one of the easiest ways to end up with a distorted charm.
Heating usually takes only a few minutes, depending on the product. Grafix gives approximately two to three minutes for its film, while the Carnegie Mellon Shrinky Dinks instructions give one to three minutes plus a short period after the piece has flattened. Follow the timing printed for your material rather than using either figure universally.
The plastic will be hot and slightly pliable immediately after heating. Manufacturer guidance recommends using caution and allowing it to cool before normal handling; adult supervision is also recommended when children are cutting or baking shrink plastic.
Step seven: Add the keychain hardware. Once the charm is completely cool, open a jump ring sideways with jewelry pliers, pass it through the shrunken hole, add the key ring or chain, and close the jump ring securely. Grafix’s dedicated keychain project follows the same basic sequence: design, cut, color, punch, shrink, cool, and attach keychain hardware.
Sealing is optional for some products. Grafix states that its finished shrink film does not require sealing but suggests a protective polyurethane coating for pieces that will receive frequent handling. Check compatibility with your particular markers and shrink film before applying any finish.
Common Shrink-Plastic Keychain Mistakes and How to Fix Them
Most unsuccessful pieces fail because of preparation or heating technique rather than artistic ability. A simple drawing can produce an excellent keychain when the material is handled correctly.
- The charm finished much smaller than expected: Make a test piece before creating size-critical artwork. Shrink ratios vary between products and heating conditions.
- The plastic curled in the oven: Give it time to complete the shrinking cycle. Grafix notes that curling followed by flattening is normal; parchment or vellum over the piece can also help reduce sticking and excessive curling for its films.
- The charm is still slightly bent: While the material is still warm, some products can be carefully flattened with a spatula or flat piece of cardboard, following the manufacturer’s instructions.
- The attachment hole disappeared or became too small: Punch the hole before heating with a standard paper punch rather than trying to create a tiny hole afterward.
- Colors look too intense: Apply lighter color during the design stage and test your markers on scrap film first. Shrinking concentrates the artwork into a smaller surface area.
The most useful habit is testing. A small scrap tells you more about your exact film, coloring medium, and oven than a universal recipe can. Grafix explicitly recommends a scrap test because temperature and baking time can affect the result.
Want to experience the creative process of making your own shrink-plastic keychains? CraftLabs workshops provide a hands-on session where participants learn how to design, color, shrink, and transform their artwork into personalized accessories. With expert guidance and all the necessary materials provided, these workshops are a fun way to explore shrink art while learning the techniques behind creating durable and unique handmade pieces. To join a CraftLabs workshop or learn more, visit www.craftlabs.sg or contact CraftLabs for more details.
Frequently Asked Questions
What temperature should I use for shrink plastic?
Follow the temperature stated on your shrink-film packaging. Different products specify different ranges; for example, Shrinky Dinks instructions published by Carnegie Mellon use 163°C (325°F), while Grafix provides a broader range for its own film.
Can I use normal markers on shrink plastic?
Permanent markers are recommended for many non-inkjet shrink films. Colored pencils work particularly well on frosted or matte surfaces. Always check the instructions for your sheet type.
Do I punch the keychain hole before or after shrinking?
Before shrinking. Use a paper hole punch while the plastic is still thin and flexible; the hole will shrink together with the charm.
Why does my shrink plastic curl while heating?
Curling is normally part of the process. Continue heating according to the manufacturer’s directions and the piece will often flatten as shrinking finishes.
Can children make shrink-plastic keychains?
They can participate in designing and decorating age-appropriate projects, but cutting and oven work require appropriate adult supervision. Craft Labs’ Singapore workshop is listed as suitable for all ages and provides trainer guidance and equipment for participants.
